The article outlines how to manage users, including creating, editing, approving, resetting passwords and 2FA. It also covers assigning roles like Administrator, Authorised Officer and User Manager with specific permissions.
Users are the people authorised to record entries into the register. Typically a user is a pharmacist, but other types are permitted - e. g. Technicians.
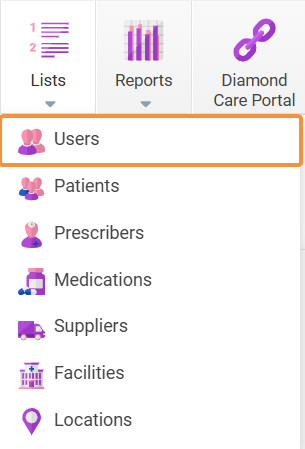
Users need to be added to the system before being able to use the system. You can view a list of users by going to Lists -> Users as per below print screen:
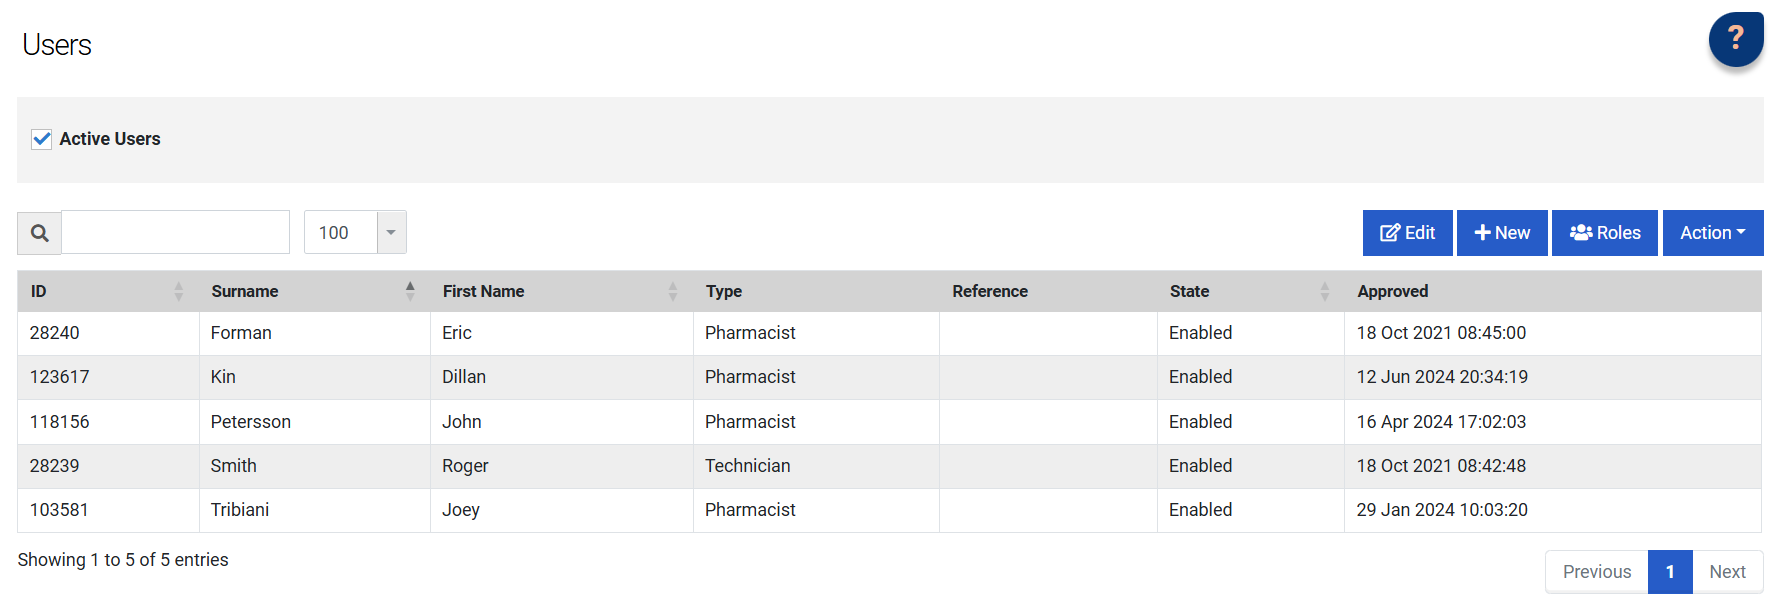
The main page will display a list of Users as follows:
|
Item |
Description |
|
Active Users |
Untick to see all Users (active and inactive). |
|
Edit |
Allows to edit User details (once User is selected in the list). Please refer to the Edit an Existing User section of this document. |
|
New |
Create a new User. Please refer to the Add a New User section of this document. |
|
Roles |
Access the Roles pop-up window to set Permissions. Please refer to the Roles article for more information. |
|
Action |
This drop-down list has various actions that can be performed after selecting a relevant User:
|
|
ID |
The unique ID assigned to the User. |
|
Surname |
The User’s surname. |
|
First Name |
The User’s first name. |
|
Type |
The User’s Role. |
|
Reference |
The reference number for the User e.g. a registration number (if required). |
|
State/Status |
Enabled – the User is enabled Disabled – the User is disabled (to see disabled Users, untick the ‘Active Users’ box on the top left-hand corner of the page. Password EXPIRED – the User’s Password is expired and must be changed (refer to Appendix B) |
|
Approved |
The date the User has been approved by the software admin/manager. |
Administrator Setup
There is a special User called the ‘Administrator’. Typically, as the name implies, the Pharmacist in charge (or at least a responsible senior person) should accept the role of Administrator in DDBook Cloud.
The key role of the Administrator is to edit Role permissions (only they will be able to do so) and sign off on any changes required under the Options of the system. An Administrator also has the authority to add new Users (and editing existing User details) - see the 'Add a New User' section of this document.
If the Administrator requires other Users to be able to approve new user creation or edits, they’ll be able to give this permission by making them User Managers (see 'User Manager' section for more info).
Finally the main Administrator can set other users as 'Administrators', in case others need to be able to change the system Options settings too.
The only thing that can solely by managed by the main Administrator, are Roles and their permissions.
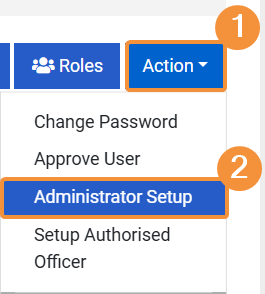
To configure the Administrator’s details go to Lists -> Users, then press the Administrator Setup action under the Action button as per below print screen:
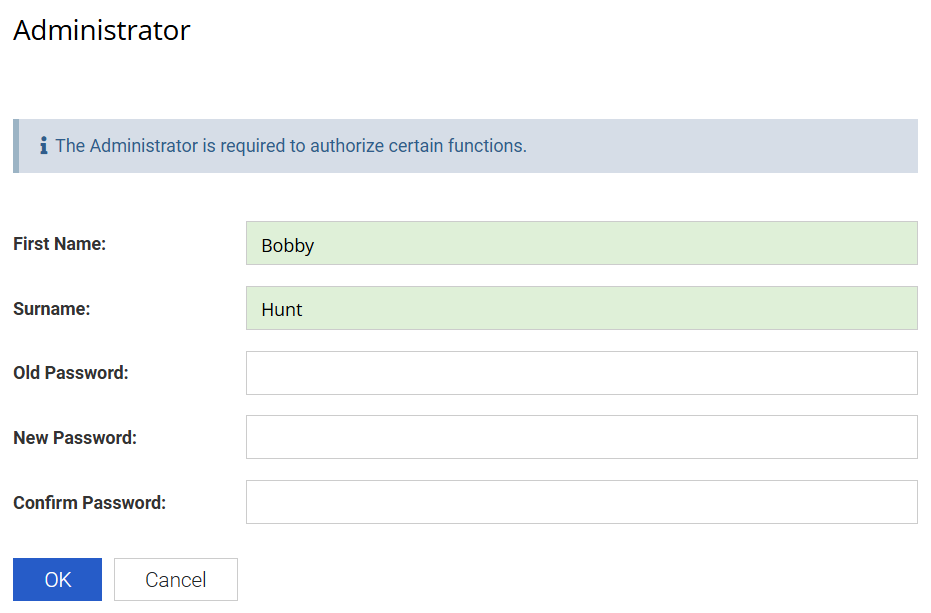
Selecting the Administrator Setup option will display the Administrator's details window as shown in the following print screen:
|
Item |
Description |
|
First Name |
Enter the Administrator’s first name. |
|
Surname |
Enter the Administrator’s surname. |
|
Old Password |
Enter the Administrator’s current Password. You will not need to enter this field the first time you set the Administrator’s Password. |
|
New Password |
Enter the new Password. Do not disclose this Password to others! |
|
Confirm Password |
Re-enter the new Password. |
|
Cancel |
Press Cancel to cancel changes. |
|
OK |
Press OK to accept changes. |
If you forgot your Administrator Password, you will need to contact Modeus Support (support@modeus.com.au or (03) 9867 2785) for assistance to reset it.
Add a New User
To create a new User, go to Lists -> Users, then press the New button as per below print screen:

Pressing the New button will display the Administrator Authorisation dialogue box as shown below:
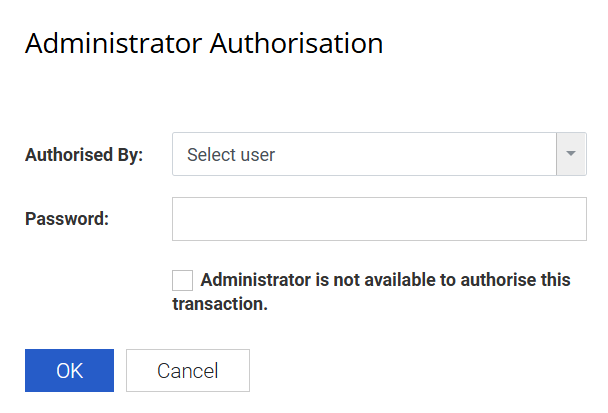
The Administrator (or User Manager) should then enter their Password in the space provided and then press OK to continue.
If the Administrator (or a User Manager) is not available to authorise this transaction, you can still proceed by ticking the ‘Administrator is not available’ box. The Administrator (or a User Manager) will then be required to Approve this new User at a later stage. Please see the Adding/Editing a User without the Manager section for more information.
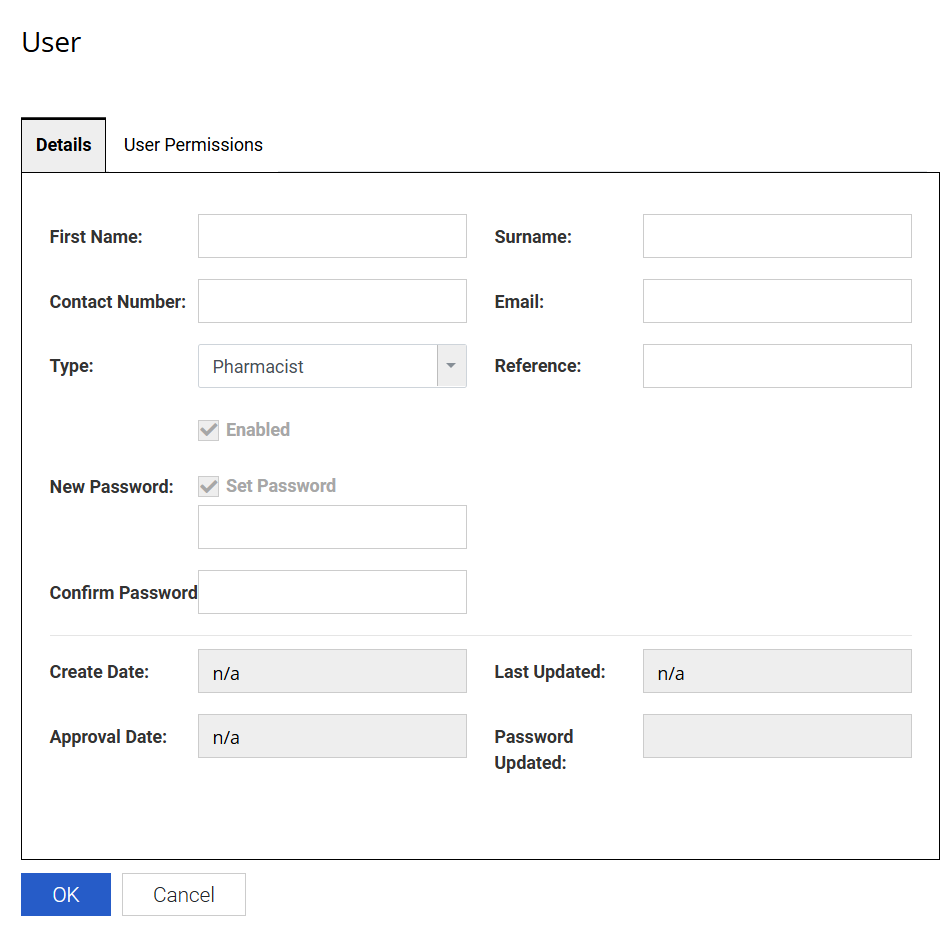
Next, the User window is displayed as shown in the print screen below:
|
Item |
Description |
| Details / User Permissions | The 'Details' tab where all user's details should be entered. Once a user created you can proceed p to the 'User Permission' tab, if this user needs to be set as a User Manager/Administrator). Find more information on User Permissions in the section below this table. |
|
First Name |
Enter the User’s first name. |
|
Surname |
Enter the User’s surname. |
|
Contact Number |
The phone number of the person being set up as a User (optional). |
|
|
The email for the User (optional). |
|
Type |
Select the User Role from the list. |
|
Reference |
Enter information relevant for the User (optional). For example, if the User is a pharmacist, they should have a registration number. |
|
Enabled |
When checked the User is enabled and can use the system. If unchecked, the user won’t be able to use the system. |
|
Set Password |
Select to set the User’s Password. |
|
New Password |
Enter the new Password. Do not disclose this Password to others! |
|
Confirm Password |
Re-enter the new Password. |
|
Create Date |
This is an auto-populated field that contains the date and time the User record was created. This value will be n/a when creating a new User. |
|
Last Updated |
This is an auto-populated field that contains the date and time the User record was last updated. This value will be n/a when creating a new User. |
|
Approval Date |
This is an auto-populated field that contains the date and time the User record was last approved by the Manager . This value will be n/a when creating a new User. |
|
Password Updated |
This is an auto-populated field that contains the date and time the User’s Password was last updated. |
|
Cancel |
Press Cancel to cancel changes. |
|
OK |
Press OK to accept changes. |
| Multi Factor Authentication | Set up Multi Factor Authentication (MFA) details (optional but highly advised) |
You should always check to see if the User exists in the system before adding a new User.
User Permissions
After creating a new user (or if an existing user needs more permissions), and Administrator / User Manager can edit said user and proceed to the 'User Permissions' tab.
| Item | Description |
| User Manager |
Select this checkbox if the User is authorised to manage user creation and edit.
(can be set/changed after User has been created) |
| Administrator |
Select this check-box if the User authorised to sign of on system Option settings (Cogwheel on top-right corner) changes AND to manage user creation and edit.
(can be set/changed after User has been created) |
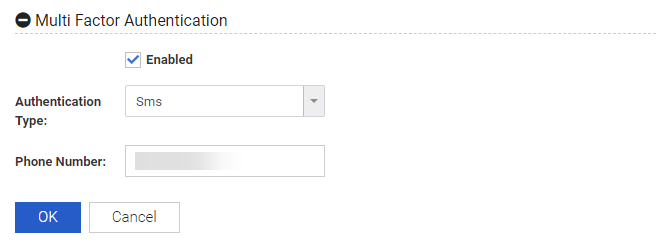
Multi Factor Authentication
By default, DDBook Cloud will require at least one user to have setup Multi Factor Authentication (MFA), however it is advise that more than one pharmacist have this setup. DDBook Cloud will trigger MFA anytime it recognises a login from a new device, or if the same device has not been authenticated in the last 150 days.
To setup MFA, scroll down to the MFA section in the user profile. Check the Enabled box, select the prefered Authentication Type (SMS/Email) and finally details of the phone number or email. Click OK to save the details.
Edit an Existing User
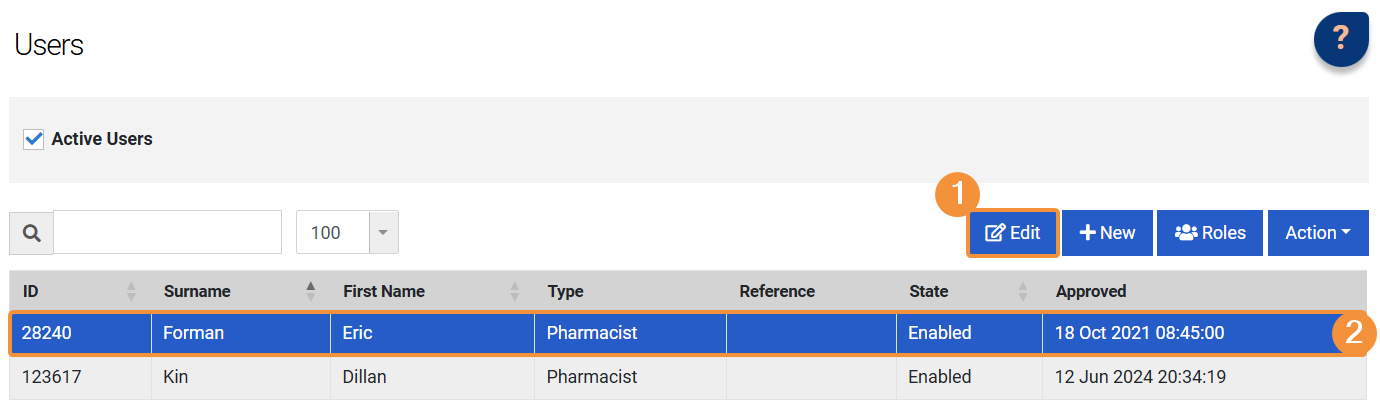
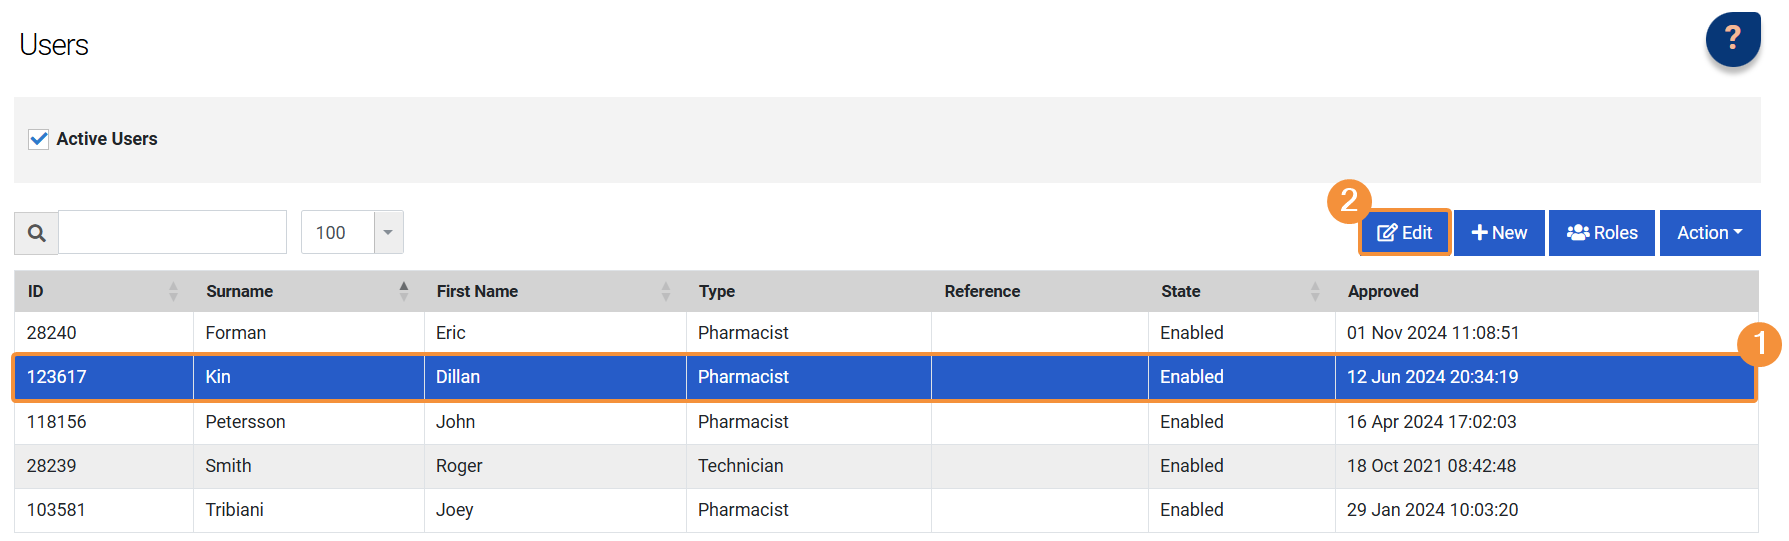
To edit an existing User, you have to select the user from the list (the item line will turn blue once selected), then press the Edit button as shown in the print screen below:
After selecting the Edit button, the Administrator (or User Manager) will be required to sign to allow a User edit. Alternatively, an Administrator (or User Manager) will need to Approve this user edit at a later stage.
Adding/Editing a User without the Administrator's Approval
As described in the previous section, a Administrator is required to authorise adding or editing Users.
However, there may be occasions where no Administrator is present to authorise the transaction. In this circumstance, the following process should be followed:
- Check ‘The Administrator is not available to authorise this transaction’ option when the Administrator Authorisation dialogue box is displayed as shown in the print screen below:
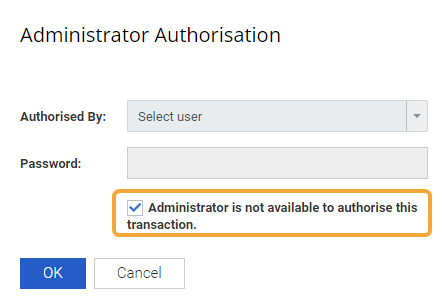
- Press the OK button to continue
- Enter the User’s details as normal
- Upon their return, the should perform the Approve User function as described below:
When a User is added/edited without the Administrator ’s approval, the user is displayed in red in the User List. This provides a visual clue to the manager that they must Approve the user as soon as practical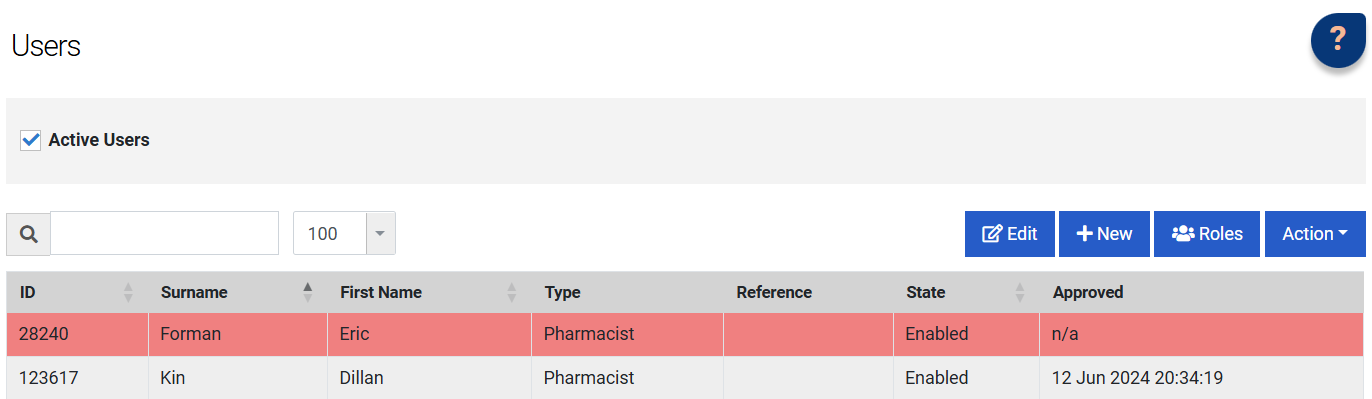
The Administrator should select the User on the User List (the line will turn blue once selected), press the Actions button and then select the Approve User menu item as shown in the print screen below:
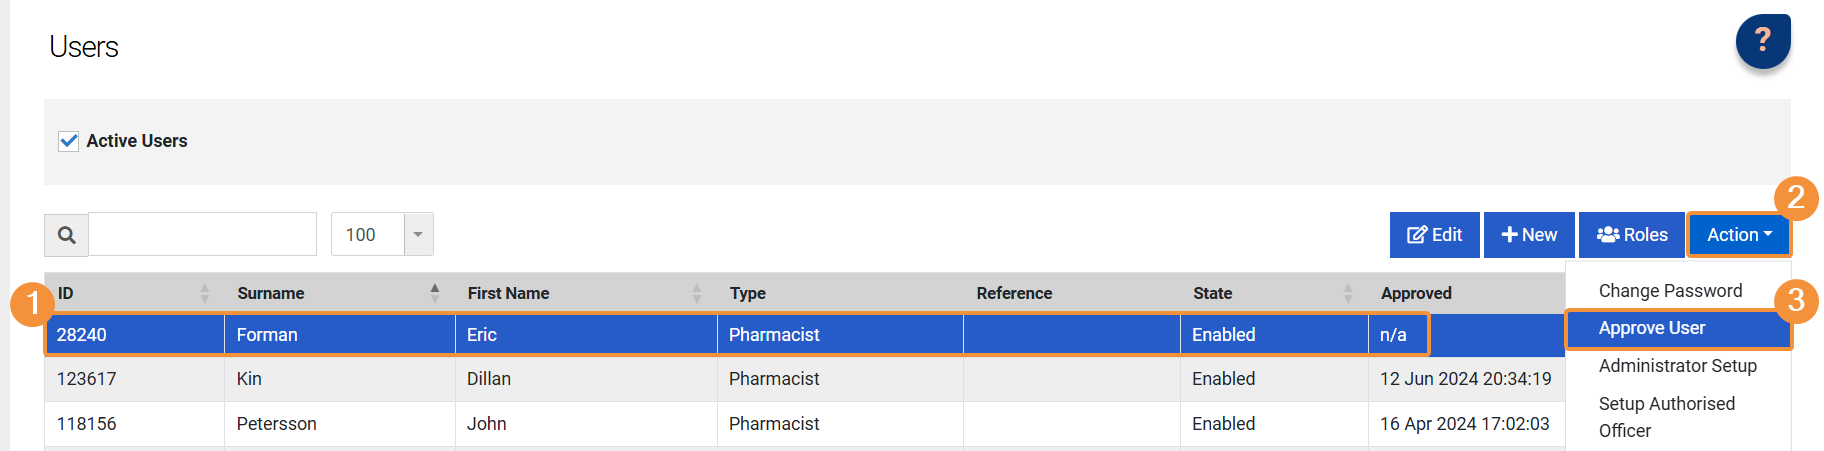
The Manager (or User Manager) will then be required to Approve the User edit/creation with their Password.
Setting up an Authorised Officer
There may be times when an Authorised Officer (such as a health inspector or police officer) must be added as a User in DDBook (e.g. if they wish to perform an audit) or in some jurisdictions (such as WA) when Destroying Stock the witness must be of a different professional group to the authorised person destroying the stock.
To set up an Authorised Officer follow the above steps in Add a New User section, ensuring you select the correct role. If an appropriate role is not avaiable, the role Other can be used.
User Manager
The Administrator in DDBook can create User Managers who will be able to approve other Users’ edits/creations.
To enable this permission go to Lists -> Users.
Once on the Users List page, select the User that needs this permission (or create a new User if necessary) and press the Edit button (someone's Administrator/User Manager Password will be required), as shown below:
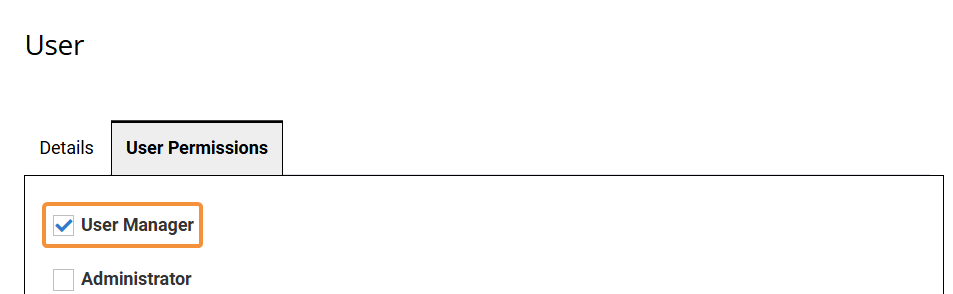
Under the User Permissions tab, tick the User Manager box and press OK, as shown in the print screen below:
This new User Manager will now be able to create/edit Users themselves, as well as approving edits/creations entered by other Users).
A User Manager won’t be able to change permissions under Roles and won’t be able to sign off on Option settings (cogwheel menu button on the top right-hand side) changes.
If a user needs to be able to sign off on Option settings changes, tick the above 'Administrator' permission, before pressing OK.